Ascend'16 - Using the extensibility benefits of EPiServer
Last year at Ascend'15 in Las Vegas, I gave a presentation about some advanced Find topics. This year, I gave a presentation at the Ascend event in Stockholm. Since I was working on some projects that included requirements to extend the CMS, I thought let's talk about that topic at Ascend. This year, I was focussed on extending the edit mode by using the extensibility benefits of EPiServer. There are many options available for extending the UI that's sometimes hard to choose the right solution. In this blog, I'll give a recap of my presentation.

Let me first highlight some parts of the UI that we can extend.
Navigation
Items to the main and sub menu can be added in different ways. Read more.
Custom gadgets
Out of the box EPiServer ships with different gadgets that can be used by the editor. Think of the blocks/media, version and recent gadget. Gadgets can be easily created and made available for different plugin areas. Read more.
Custom views
There are different views available that the editor can use: all properties view, preview view, compare view, etc. All those views work with IContent items, we can also create our own view. Read more.
Create a custom layout
We can create our own custom layout by using the CompositeView class. The layout can be divided in different plugin areas. Editors can use those plugin areas for adding gadgets. Read more.
Add buttons to the toolbar
Add items to the page tree context menu
These are just some examples of parts that can be extended, on World you can find many more blogs that describes how you can extend the UI.
On the hand of some requirements, I will give examples how we can extend the UI.
-
Manage contact information in CMS
- Show detail information
- Show the contact location on a Google Map
- Send message directly to the contact
- Use contact information on pages
- Focus on the edit mode instead of the admin mode
What we want to do is manage contact information in the edit mode. If the editor selects a contact item a custom view needs to be loaded with all the detail information and the location on a Google Map. Also, the editor needs to send a message to this contact directly. Editors should also be able to display contact items on pages.
How store the data?
In EPiServer we've multiple options for storing the data. Let me just highlight three different options.
Dynamic Data Store (DDS)
The dynamic data store is there for a long time. It's easy to use and we can create entities from code and those objects are saved in the database. We might run into some performance problems when storing a lot of data. Find more information about DDS here.
Entity Framework
I think most developers are familiar with Entity Framework. We can use a code-first or database-first approach. If the framework is used correctly, we don't have the performance problem that might occur with DDS.
Store as IContent
Everything that's content related in EPiServer is inheriting from IContent. Think of pages, blocks, media, form types (new forms extension) and even some parts of the new promotion engine. We can create our own class and inherit it from IContent. By doing that we can use functionality that EPiServer internal also use when working with IContent. Some examples:
- UI parts, views like the all-properties view for managing the data.
- Data is store automatically in the database (in the tables where all IContent items are stored)
- Use the IContentReporitory to work with items in code
- EPiServer Find to search for IContent items
- Many more
For our requirements, I've created a class which inherits from ContentBase (this class at the end inherits from IContent).
ContactData : IContent
So I've created a class that inherits from ContentBase. Now we can work with the class the same way as with pages/blocks, for instance, I can define properties. EPiServer will scan the ContactData class during initialization and saves that information in the database so the editor can work with contact items.
 [ContentType(DisplayName = "Contact data", GUID = "{C1D8A647-6AF3-4D00-8E09-6A7BC4084F88}", Description = "")]
        public class ContactData : ContentBase
        {
            [Required]
            [Display(
                Name = "Name",
                Description = "",
                GroupName = SystemTabNames.Content,
                Order = 10)]
public virtual string FullName { get; set; }The editor's needs have a starting point for working with contact items. EPiServer uses gadgets for managing the pages, blocks and media. Basically I want to have the same functionality, namely give editors the ability to create, edit, list and delete contact items. So I've done the same for contact items, so I've created my own gadget. The gadget has the same look and feel as the blocks/media gadget, because I'm reusing the Dojo widget that EPiServer internally uses for rendering the blocks/media gadget. Of course, I could also create my own widget, but it's saved me a lot of time to just reuse functionality that's already there. Since ContactData inherits from IContent I can use the HierarchicalList widget from EPiServer. There are three things we need to do for creating such a gadget, let's start with the first part.
For creating a gadget (I think component is the official word), I created a class which inherits from ComponentDefinitionBase. There are some basic configuration we can set such as a name, description, sort order and a category. The gadget can be made available for different plugin areas. My gadget is only available in the assets plugin area, which is on the right side of the CMS (where the block and media gadget is displayed). A Dojo widget can be defined for doing the rendering part, again I'm reusing the HierarchicalList widget from EPiServer.
    [Component]
        public class ContactsGadget : ComponentDefinitionBase
        {
            public ContactsGadget() : base("epi-cms.widget.HierarchicalList")
            {
                Categories = new string[] { "content" };
                Title = "Contacts";
                Description = "Gadget for managing contacts";
                SortOrder = 1000;
                PlugInAreas = new[] { PlugInArea.Assets };
                Settings.Add(new Setting("repositoryKey", ContactDataRepositoryDescriptor.RepositoryKey));
            }
        }
For the HierachicalList widget, we can define even more configurations by creating a class which inherits from ContentRepositoryDescriptorBase. There are different configuration that we can set, let me just hightight two, contained types and roots property. The contained types property tells the widget which types can be managed in the gadget. In my case, a ContentFolder and of course my own ContactData class. Secondly, in the Roots property we can define a ContentReference. Since all IContent items need to have a parent, we also need to do this for the contact items, because ContactData inherits from IContent. During initialization, I'm creating a ContentFolder programmatically. I set the ContentReference of this ContentFolder in the Roots property. So that means all created contact items will be displayed under that ContentFolder.
A custom view for displaying all contact information
Next the custom view, whenever the editor selects one contact item we want to show all the detail information, a form for sending a message and show the contact location on a Google Map. For this, I've created a custom view. Out of the box EPiServer comes with different views for IContent:
- All properties compare view
- All propertiew view
- Content listing view
- On page edit view
- Preview view
- Side by side compare view
All of these views are available when working with IContent. For creating a custom view, we need to create a class which inherits from ViewConfiguration<T>. The generic tells EPiServer for which type this view is available.
[ServiceConfiguration(typeof(ViewConfiguration))]
public class ContactInformationViewConfiguration : ViewConfiguration<ContactData>
{
public ContactInformationViewConfiguration()
{
SortOrder = 1;
Key = "contactInformation";
Name = "Contact information";
Description = "Contactinformation";
ControllerType = "app/editors/contactinformation"; // epi-cms/widget/IFrameController;
//ViewType = Path to your view
IconClass = "epi-iconLayout";
HideFromViewMenu = false;
}
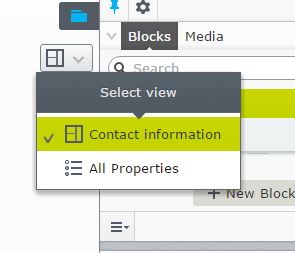
}In the code snippet, you can see there are a couple of different properties we can set. The ControllerType property defines which DOJO widget EPiServer use for rendering the view. For this example, I've created my own custom widget. If you don't feel like using Dojo, you can also define the IFrameController widget and the path to your MVC view in the ViewType property. EPiServer will load the defined view in an iFrame. The HideFromViewMenu property indicates whether our custom view needs to appear in the view menu, as shown in the image.
We can control the view menu even more by creating a class which inherits from UIDescriptor<T>. The UIDescriptor only applies for the defined type as generic. In this class, we can set the default view. The default view obviously will be used when a contact item in the CMS has been selected. Also, we can disable views that we don't need.
    [UIDescriptorRegistration]
        public class ContactDataUiDescriptor : UIDescriptor<ContactData>
        {
            public ContactDataUiDescriptor()
            {
                DefaultView = "contactInformation";

                AddDisabledView(CmsViewNames.OnPageEditView);
            }
        }
What you saw in the ViewConfiguration<> class is that I've specified a custom Dojo widget for the rendering part. Again, if you are not comfortable using Dojo you can always create a MVC view instead. There are some great blogs on World available that explain how you can create your own Dojo widget. When you're new with Dojo I would advice to go to the official site from Dojo Toolkit and read some documentation and follow tutorials to become familiar with the framework. Then, try to integrate you Dojo widget in EPiServer. I'll not explain Dojo in this blog post, but just show the code instead. So I've created a Dojo widget that uses a HTML template for the markup. Also, I'm loading a stylesheet for styling the markup. For loading a Google Map (via the API) in my widget, I've created another Dojo module.
Via the ContextService I can get the current content (contact) identifier. I'm calling a rest store (will explain shortly what that is) with the identifier as a parameter for retrieving all the contact information. Then I'm binding the returned data to the markup in my HTML template.
define([
        "dojo/_base/declare",
        "dojo/parser",
         "dojo/when",
         "dojo/_base/lang",
         "dojo/window",
         "dojox/layout/ScrollPane",

        "dijit/_Widget",
        "dijit/_TemplatedMixin",

        "epi-cms/contentediting/StandardToolbar",

        "epi/dependency",

        "dojo/text!./templates/contactinformationtemplate.html",
        "xstyle/css!./templates/styles/custom-styles.css",

        "app/editors/gmapLoader!http://maps.google.com/maps/api/js?key=AIzaSyDiD2Z6dHg-PGNCYQQ0v0pWZyecX40A9cw"

    ], function (
        declare,
        parser,
        when,
        lang,
        window,
        ScrollPane,

        Widget,
        TemplatedMixin,

        StandardToolbar,

        dependency,

        template
    ) {
        return declare("app.editors.contactinformation", [Widget, TemplatedMixin], {

            templateString: template,
            contactStore: null,

            postCreate: function () {
                this.inherited(arguments);

                var height = window.getBox().h - 200;
                this.containerScroll.style.height = height + "px";

                parser.parse(this.containerRoot);

                console.log("Contact information widget loaded");

                this.toolbar = new StandardToolbar();
                this.toolbar.placeAt(this.toolbarArea, "first");

                var registry = dependency.resolve("epi.storeregistry");
                this.contactStore = registry.get("contactstore");

                var contextService = epi.dependency.resolve("epi.shell.ContextService");
                var currentContext = contextService.currentContext;

                this.initContactInformation(currentContext);
            },

            initContactInformation: function(context) {
                var res = context.id.split("_");

                var currentContentId = res[0];
                var providerName = "";
                if (res.length > 2) {
                    providerName = res[2];
                }

                dojo.when(this.contactStore.query(
                        {
                            id: currentContentId,
                            providerName: providerName
                        }),
                        lang.hitch(this, function (data) {
                            this.fullNameHeader.innerText = data.fullName;
                            this.fullNameLabel.innerText = data.fullName;
                            this.addressLabel.innerText = data.addressText;
                            this.emailLabel.innerText = data.email;
                            this.phoneNumberLabel.innerText = data.phonenumber;
                            this.companyLabel.innerText = data.company;
                            this.functionLabel.innerText = data.function;

                            this.initGoogleMap(data);
                        }));
            },

            initGoogleMap: function (data) {
                var geocoder = new google.maps.Geocoder();
                geocoder.geocode({ 'address': data.city + ", " + data.country }, lang.hitch(this, function (results, status) {
                    if (status == 'OK') {
                        var latLng = new google.maps.LatLng(results[0].geometry.location.lat(), results[0].geometry.location.lng()); {; }

                        console.log("Lookup coordinates: " + latLng);

                        var map = new google.maps.Map(this.map, {
                            center: latLng,
                            zoom: 8
                        });

                        var marker = new google.maps.Marker({
                             map: map,
                             position: latLng});
                    }
                }));
            },

            updateView: function(data, context, additionalParams) {
                // summary:
                //      Called by the menu item
                // tags:
                //      public
                if (data && data.skipUpdateView) {
                    return;
                }

                this.initContactInformation(context);

                this.toolbar.update({
                    currentContext: context,
                    viewConfigurations: {
                        availableViews: data.availableViews,
                        viewName: data.viewName
                    }
                });
            }
        });
});In the previous section, I explained that I'm retrieving all the contact information by calling a rest store. A rest store is similar to a web api controller. We can use a rest store for loading and saving data from within a Dojo widget. Of course, it's not mandatory to use a rest store, it's also possible to use a web api controller instead. Basically, both do the same thing, of course for the more complex functionality it's better to use a web api. A rest store can be created by creating a class which inherits from RestControllerBase and decorate the class with the RestStore attribute. In this attribute, we can name the rest store. You will need this name for registering the rest store in a Dojo widget. A good practice is to register the rest store in a Dojo initializer. The initializer is called only once when loading a page in the CMS. The idea is to register it only once and then use it in the different Dojo widgets. My rest store contains only one Get method that returns a viewmodel containing all the contact information.
    [RestStore("contactstore")]
        public class ContactRestStore : RestControllerBase
        {
            private readonly IContentRepository _contentRepository;

            public ContactRestStore()
            {
                _contentRepository = ServiceLocator.Current.GetInstance<IContentRepository>();
            }

            [HttpGet]
            public RestResult Get(int? id, string providerName)
            {
                var model = new ContactViewModel();

                if (id.HasValue)
                {
                    ContentReference contentReference;
                    if (!string.IsNullOrEmpty(providerName))
                    {
                        contentReference = new ContentReference(id.Value, providerName);
                    }
                    else
                    {
                        contentReference = new ContentReference(id.Value);
                    }
                    var contact = _contentRepository.Get<ContactData>(contentReference);

                    model.FullName = contact.FullName;
                    model.AddressText = contact.GetAddressText();
                    model.StreetAddress = contact.StreetAddress;
                    model.PostalCode = contact.PostalCode;
                    model.PoBox = contact.PoBox;
                    model.City = contact.City;
                    model.Region = contact.Region;
                    model.Country = contact.Country;
                    model.Email = contact.Email;
                    model.Phonenumber = contact.Phonenumber;
                    model.Company = contact.Company;
                    model.Function = contact.Function;
                }
                return base.Rest(model);
            }
}Below, an animated gif of the solution in EPiServer.

You can view the full source code on my Github account. In my next blog, the specification changes a little bit. So instead of managing all contact information in EPiServer, we're going to manage it in Google Contacts.
 Twitter
 LinkedIn
 GitHub